Using Job Templates for Jobs
Document templates are a quick, low code way to re-use job settings for your most routine mailings. The basic concept is that you can configure the job options through the website UI, save the configurations as a template, and then simply upload your mailing list and/or document programmatically. This reduces the amount of options you have to set through the API calls and will ensure the right set of options for that Document class.
Creating the Job Template
Step 1: Sign into your account on Click2Mail official website or navigate to your account page if already signed in.
Important If you are working in staging, create the job through the staging site.
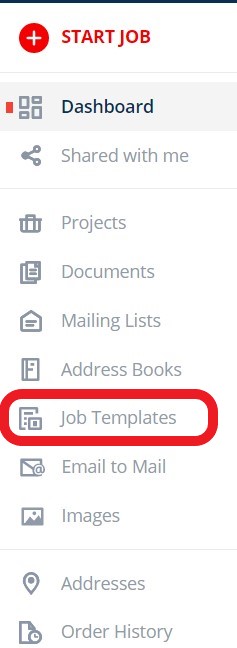
Step 2: Select Job Templates along the menu bar

Step 3: For creating a Rest API template, select the Rest API option along the top sub navigation bar and click CREATE in the upper right hand corner.

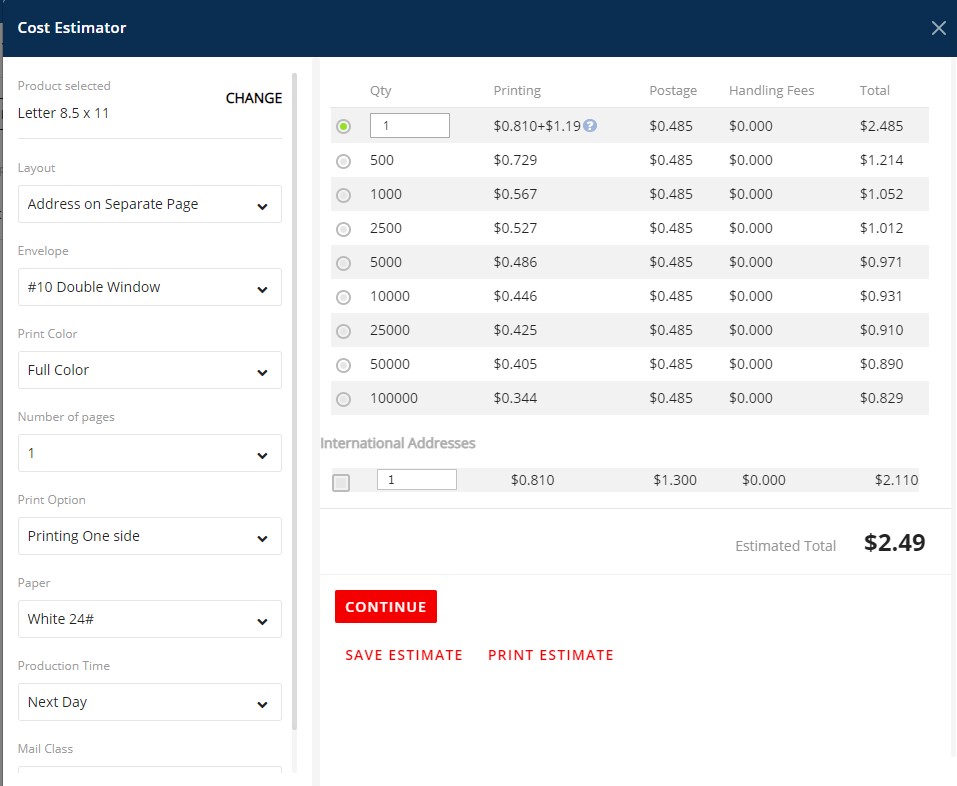
Step 4: Follow the wizard to select the desired document type. A series of options will appear with drop down selections for choices. These drop downs will only populate with valid configurations.
Example for a Letter document type.

Step 4: An overview page of the configurations will appear for review ahead of selecting mailing list or document. You can choose to supply either the mailing list or the document, or you can leave both blank to be provided in the API call.
Actions on this screen:
4a. Name the template with something unique and meaningful to this job in the upper left hand corner. This is how you will refer to the template in the API call.
4b. Select a document to be associated every time this template runs. This is optional as a dynamic document can be associated at the time of API call.

4c. Select a mailing list to be associated every time this template runs. This is optional as a dynamic mailing list can be associated at the time of API call. You can select from an existing mailing list, choose to purchase a mailing list, or follow the mailing list creation wizard to generate a new one.

4d. You can change the return address, otherwise it will default to your registration address.
Step 5: Hit Save and verify you see your newly create template in the list.
Using the Job Template through the API
To make use of the template created through the UI, use the call /jobs/jobTemplate.
Step 1: Use the template name from above in the templateName option in the body. This will create a job id with the options selected through the interface. Sample returned XML will look like:
<?xml version="1.0" encoding="UTF-8" standalone="yes"?>
<job>
    <id>538024</id>
    <status>0</status>
    <description>Created</description>
    <statusUrl>https://stage-rest.click2mail.com/molpro/jobs/jobTemplate/5380214</statusUrl>
</job>
Step 2: Provide the mailing list and/or document using the normal /jobs/update call.
The input parameters are the addressListId and documentId. This presupposes you have already uploaded a document and uploaded an address list.
Step 3: Submit the job following the same process as documented in the Submit a Job instructions.
Updating the Template
If you update the job template, it will automatically change the options for the next time the template is called. This means you do not need to change your API in order to reconfigure the job.
Updated 9 months ago
