Using Variable Data / Mail Merge
You can personalize your documents such as inserting names and custom created values through the variable data process, sometimes also know as mail merge. This process allows you to upload a CSV file with names, addresses, and any set of custom fields to be used in your documents. When the documents are produced for distribution, the process will create unique documents through inserting the fields via a mapping defined by you.
This process uses a mix of the website mapping tools to set up the document and the API to finalize and submit the job. Once you have the document and job template created, you can reuse the template for future mailings.
Creating a CSV file to map fields for the database
Step 1: Create a CSV file with column header names and one sample row of data. The column header names are alpha-numeric without spaces or special characters, though underscores are allowed. The sample row of data is for mapping and proofing purposes only and will not be included in any production runs.

Step 2: After logging into your account, select 'Mailing Lists' along the side navigation and then upload the CSV. When testing in the Staging environment this is done through a staging web interface. Once ready to promote to production, you will need to recreate the form on the production site.
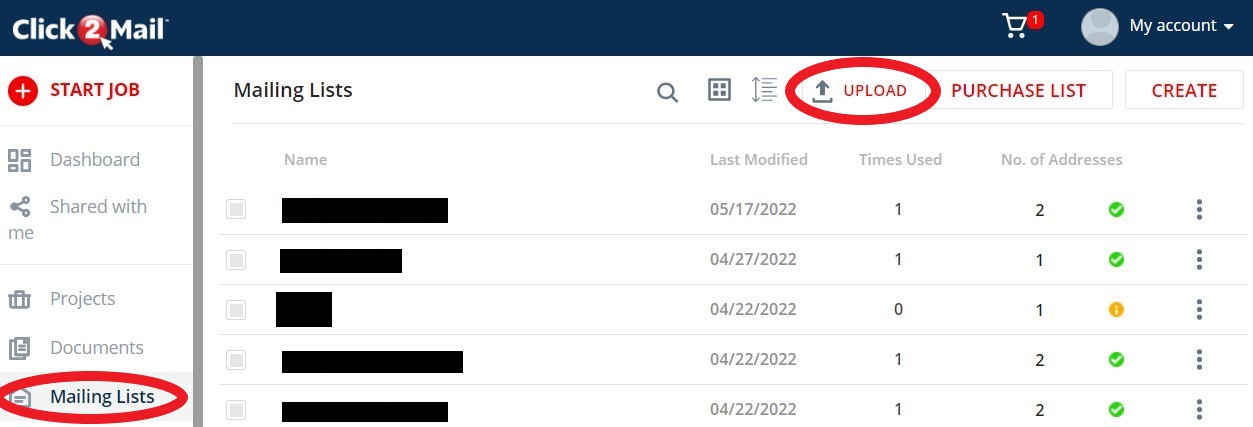
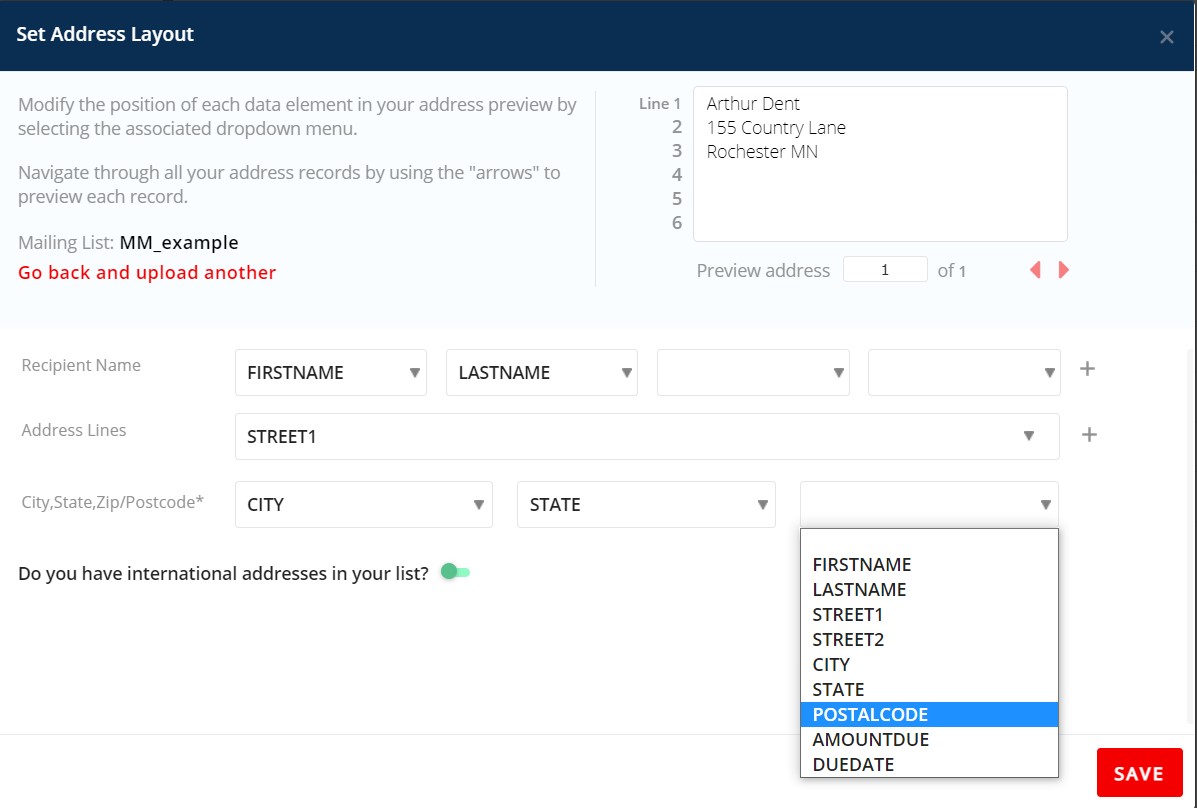
Step 3: Follow the prompts to map the headers of the CSV file as a mailing list. The sample row of data will appear in the upper right hand corner to help you verify your mapping.
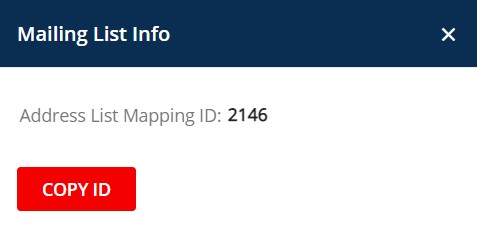
Step 4: Click the three dots on the right then 'Mailing List Info' to find the mapping ID of the list, this will be needed later when associating the mapping.
Creating Document with Custom Mapped Fields
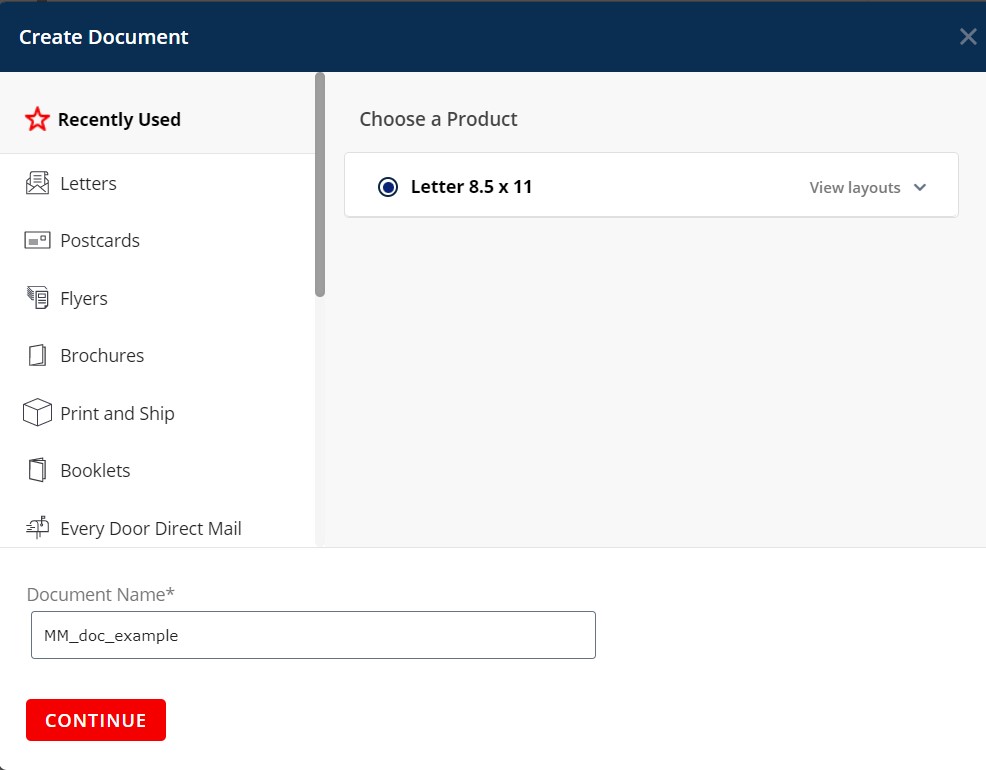
Step 5: Create a new document through the web interface
Step 6: Associate the Mailing List created earlier to the document.
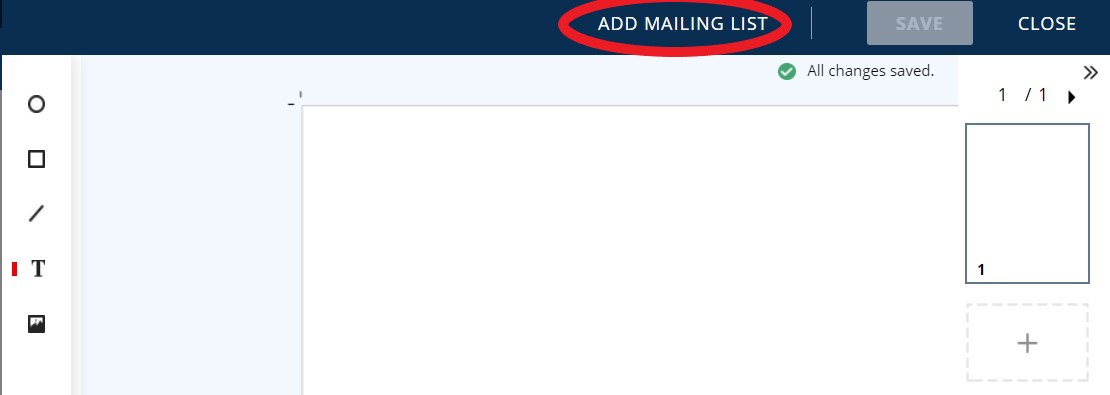
The top bar should now show your mailing list name with the option to change as needed.

Step 7: This is where the magic happens to use the mail merge fields to create the personalized documents. For this example, we are using a text only letter to demonstrate how to insert the fields. While editing a text box within the new document, look for the underlined {M. When clicked, a drop down selection will appear with all fields mapped from the original CSV. The field name will be inserted as a replacement token.
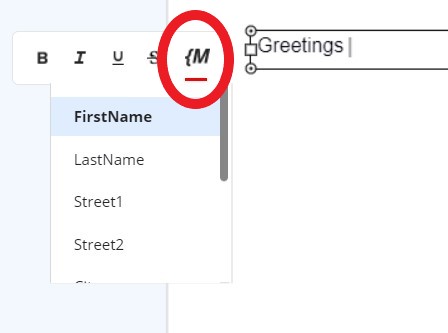
You can use as many or as few of the fields that you like. A letter using both parts of the address and the custom fields may look like below.
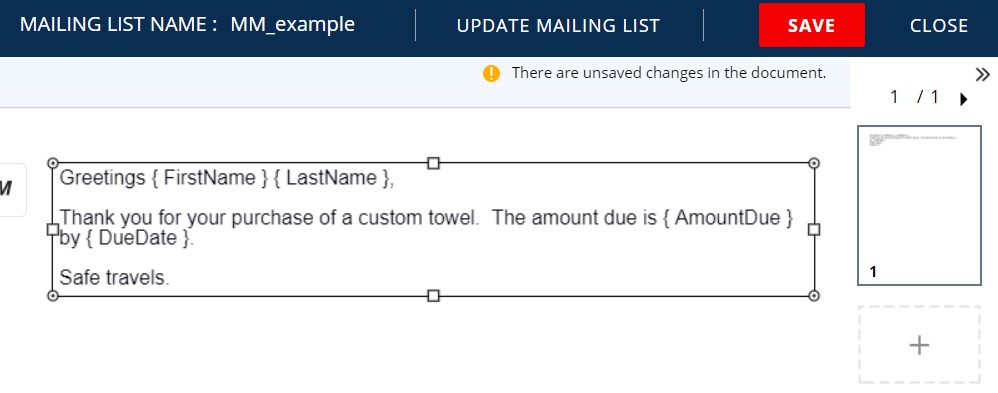
After you are happy with your document, click SAVE and close.
Creating Job Template
Step 8: Now that your document is built with the merge fields inserted, the final step before submission is to create a template for the job. This will all you to easily make updates to the job parameters in the future.
The process for creating a template is laid out in the Using Document Templates for Jobs guide. A few key notes to keep in mind:
- Make sure the size page you select matches the page size of your document
- The document to be attached to the template is the one created in Step 5.
- DO NOT add a mailing list. Your API call will provide that.
- Make note of the name of the template. You'll need it below
Submitting Job via REST API
Executing the job is a four-step process:
- Create a job and get the job ID
- Submit the merge fields you want to use by creating a new address list
- Update the job to use the new address list
- Submit the job and check the proof
Step 9: Use the /jobs/jobTemplate to create a new job based on the template created above:
# Load the HTTP requests module
import requests

# Define credentials
myusername = 'awesomeuser'
mypassword = 'gReAt/PaSsWoRd123'

headers = {'user-agent': 'my-app/0.0.1'}

# Set the template name
templateName = "towelOrders"

# Define the endpoint to use, including the jobId
url = "https://stage-rest.click2mail.com/molpro/jobs/jobTemplate?templateName=" + templateName

# Make the POST call
r = requests.post(url, headers=headers, auth=(myusername, mypassword))

# Display the result - a success should return status_code 201
print(r.status_code)

# Display the full XML returned.
print(r.text)
Note the job ID from the returned XML. In this example, it's 15226472:
<?xml version="1.0" encoding="UTF-8" standalone="yes"?>
<job>
    <id>15226472</id>
    <status>0</status>
    <description>Created</description>
    <statusUrl>https://stage-rest.click2mail.com/molpro/jobs/jobTemplate/15226472</statusUrl>
</job>
Step 10: Now it's time to build the "address list" that contains all of the merge fields you want to generate. This is done following the same process as shown in the Upload an Address List Guide. The key things to know are:
- Use the mapping ID from Step 4 above
- Make sure that your fields exactly match the fields you defined in your initial CSV file from Step 1.
The XML body for your call should look something like the code snippet below, which will generate two mailings, one to "Awesome User", and one to "Sharky Roberts":
...

# Build the XML block containing the mappingId and the
# address information
body = (
'<addressList>'
  '<addressListName>MailMergeList</addressListName>'
  '<addressMappingId>2146</addressMappingId>'
  '<addresses>'
    '<address>'
        '<FirstName>Awesome</FirstName>'
        '<LastName>User</LastName>'
        '<Street1>715 S Calhounne St</Street1>'
        '<Street2></Street2>'
        '<City>Terra Firma</City>'
        '<State>IN</State>'
        '<PostalCode>46802</PostalCode>'
        '<AmoundtDue>$42</AmountDue>'
        '<DueDate>3/14/2022</DueDate>'
    '</address>'
    '<address>'
        '<FirstName>Sharky</FirstName>'
        '<LastName>Roberts</LastName>'
        '<Street1>157 N Cale St</Street1>'
        '<Street2></Street2>'
        '<City>Hometown</City>'
        '<State>NEN</State>'
        '<PostalCode>68025</PostalCode>'
        '<AmoundtDue>$547</AmountDue>'
        '<DueDate>3/18/2022</DueDate>'
    '</address>'
  '</addresses>'
'</addressList>'
)

...
Submit the address list as shown in Upload an Address List, and note the addressList ID that's returned in the XML (72743 in the example return block below):
<?xml version="1.0" encoding="UTF-8" standalone="yes"?>
<addressList>
  <id>72743</id>
  <status>3</status>
  <description>CASS Standardized</description>
  <statusLocation>http://stage-rest.click2mail.com/molpro/addressLists/72743</statusLocation>
</addressList>
Step 11: The final preparatory API step is to update the job created in Step 9 to use the address list you just created. You will need the job ID from Step 9 (15226472) and the address list ID from Step 10 (72743).
# Load the HTTP requests module
import requests

# Note the ID of the previously-created job
jobId = '15226472'

# Define the endpoint to use, including the jobId
url = "https://stage-rest.click2mail.com/molpro/jobs/" + jobId + "/update"

# Define credentials
myusername = 'awesomeuser'
mypassword = 'gReAt/PaSsWoRd123'

headers = {'user-agent': 'my-app/0.0.1'}

# Set the address list ID
values = {'addressId': 72743}

# Make the POST call
r = requests.post(url, data=values, headers=headers, auth=(myusername, mypassword))

# Display the result - a success should return status_code 201
print(r.status_code)

# Display the full XML returned.
print(r.text)
If successful, you should get an HTTP 201 code and XML return like:
<?xml version="1.0" encoding="UTF-8" standalone="yes"?>
<job>
  <id>547441</id>
  <status>0</status>
  <description>success</description>
  <statusUrl>https://stage-rest.click2mail.com/molpro/jobs/15226472/update/15226472</statusUrl>
</job>
Step 12: At this point everything is ready, so we can submit the job! Remember your job ID (15226472), and follow the steps in the Submit a Job guide.
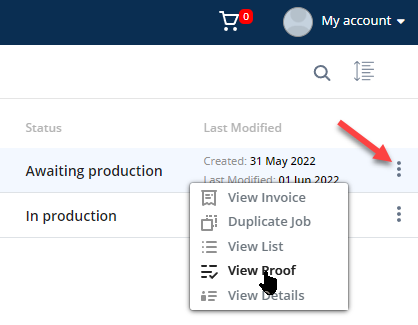
After the job is successfully submitted, you can log into the web interface, go to Projects, click on Switch to Jobs View, and find your job. Click on the three-dot menu on the right and choose View Proof to download your proof!
Additional Help
If you would like to watch a walkthrough of this process using Postman, we have a Personalization Video on this
Updated 9 months ago
